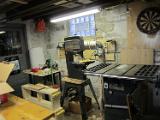
My small basement workshop. Using the bansdsaw, tablesaw, drill press, router table, power sander, and hand tools I began shaping various parts over the winter.
"Scarfing the keelson" Two long pieces of cypress wood are bevelled to allow them to mate end-to-end to form the keelson, which is the backbone of the boat
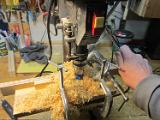
I created lots of wood shavings as I shaped many small spacer blocks for the gunwales (pronounced "gunnels")
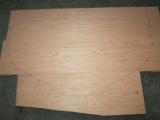
Three wide peces of cherry wood splined together to create the transom
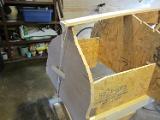
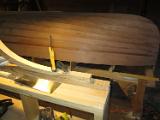
The transom blank after gluing and sanding
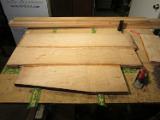
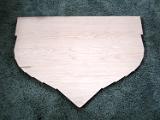
The transom after cutting the outline. Further shaping will be done on the building jig before each plank is attached. The top is left straight for now to align it to the building jig, but will get a graceful curve after the hull is finished.
A home-made steam box that I used for the laminations that make up the inner stem. A propane camp stove and garage sale pressure cooker provide the steam.
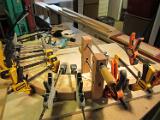
The cypress laminations curved to create the shape of the inner stem - a trial fit before gluing. Many clamps are needed for boatbuilding. Some say to get a boat bigger than the one you want to build and fill it with clamps. Now you have enough clamps to build your own boat.
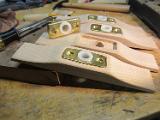
Oarlock blocks made of cherry wood, with bronze oarlock sockets
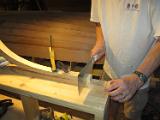
Cutting a spline for one of the quarter knees that will reinforce the corner between the transom and the top plank of the boat
Assembling the backbone of the boat, which is built upside down over a set of wooden molds. The inner stem on the left has been shaped and cut to join the front end of the keelson.
The aft end of the keelson is pulled down to meet the bottom of the transom using a Spanish windlass
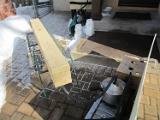
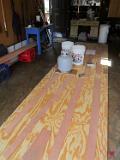
The planks are cut from 8 foot sheets of 1/4 inch thick marine plywood. Two pieces are glued end-to-end using a scarf joint to create a single plank. I used buckets of water and a propane tank to provide clamping force while the epoxy cured.
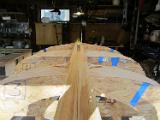
A view of the keelson looking from the stem toward the transom. The keelson has been beveled to match the angle of the molds, and a centerboard slot has been cut in the middle.
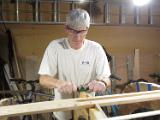
Using a spokeshave to shape the "floors", which go across the boat and will support the floorboards, which run along the length of the boat.
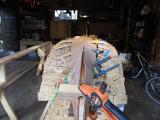
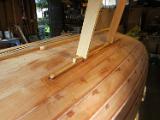
Looking aft from the stem after the first two planks (called the "garboards") have been glued and clamped.
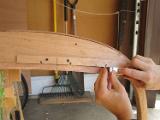
Cutting the "gains" to allow the planks to join flush at the stem
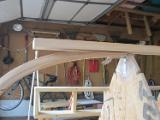
The outer stem and and keel are clamped together to cut an angled scarf joint. On the boat the curved stem will be flipped over to join the two pieces at the angled joint.
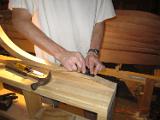
Saw cuts are made to increasing depths to provide a guide for removing the wood.
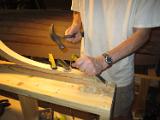
A chisel is used to rough cut the angle.
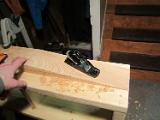
I used a plane for the final clean up of the angle.
Strips of wood (called bilge runners) are attached to the bottom to protect the planks when sitting on a beach. It's impossible to use a clamp for this, so I wedged boards from the garage rafters to apply downward force while the epoxy cured.
After the planks were finished, the skeg (fin at the rear of the hull) was glued and screwed in place.
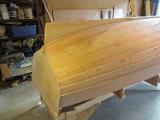
The view after coating the hull with two coats of epoxy (to seal the wood.) The left half has been sanded in preparation for priming and painting.
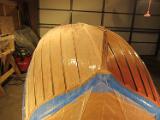
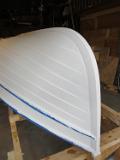
A view of the bow after putting primer on the hull. The lines of the planking really stand out.
As the fall weather got colder I built a temporary plastic tent in the garage, to hold in teh heat so that I could continue painting.
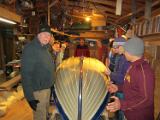
Thank you to all the neighbors who came out on a cold night for the turnover party. They followed the #1 rule of boatbuilding - "Don't drop the boat!"
In October I moved the project to Minneapolis MAKE, a workshop in NE Minneapolis where I've continued to work over the winter.
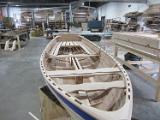
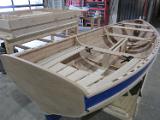
The thwarts (seats) and centerboard trunk have been installed. The block at the front with the circular hole will hold the base of the mast.
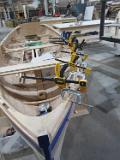
Side rails have been glued and clamped in place.
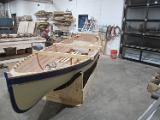
It's looking more like a boat with supports for the mast near the front, rear seats and side benches.
A view from the transom.
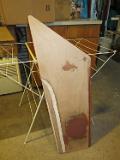
This is the centerboard that pivots to 3 feet deep when sailing. The area at the bottom contains a 10 lb slug of lead to weight it down.